Install Ubuntu 20.4 on a 2010 MacBook
Status: Resolved
Publication date: 2021-05-18
Last edited by: Garyf
Last updated: 2024 - 09 - 4
The problem
A few years ago my old MacBook failed, turned out to be an issue with the hard drive so replaced it, I had to re-heat sync the CPU as well. When it initially started working again I had already purchased a new laptop, a MacBook Air, so thought I would stick a Linux OS on the old one. Initially, I did Fedora, but over the years I got fed up of that with issues upgrading. So this year I decided to stick Ubuntu onto it. This is how I did it:
The resolution
Please note: cheekyfactor.com or the owners of this site cannot be held responsible if things go wrong. You perform these tasks at your own risk.
Device: MacBook
Operating system: Ubuntu
Software: No software identified
Guidance for MacBook, Ubuntu,
The first thing I needed to do was to download a copy of the operating system, I did that on the Fedora operating system. I then used a USB stick that I had not doing anything and restored the stick using the image I had downloaded.
Next was to get any files off Fedora that I wanted to keep. I copied these files onto a external hard drive, no need to do a full back up, there weren’t that many.
A shut Fedora down for one final time. I inserted the USB stick into the MacBook. I booted up the machine holding down the Alt/Command key, I let go and got this:
I selected the first EFI Boot. This will take you to a screen asking what you want to boot into. I couldn’t get a photo of this, it was quick. When you see the screen I chose Ubuntu and pressed the letter “e”. This took me to:
Where you quiet splash, take your curser down and add nomodeset
This reads:
linux /casper/vmlinuz file=/cdrom/pressed/ubuntu.seed maybe-ubiquity quiet splash nomodeset ---
Press F10 to proceed. Eventually you will get a screen like this:
Once Ubuntu has done its thing you will be asked if you want a demo or install:
This time am going to install Ubuntu. Now you will be taken through the install process.
The first thing to do is select your keyboard. My MacBook is a English UK Macintosh keyboard:
In theory you should be able connect to your network on the next screen. But I had issues with that so I selected the WiFi network at the top right hand corner, select the network and stick your password in.
Click on continue, you will now be asked what type of install:
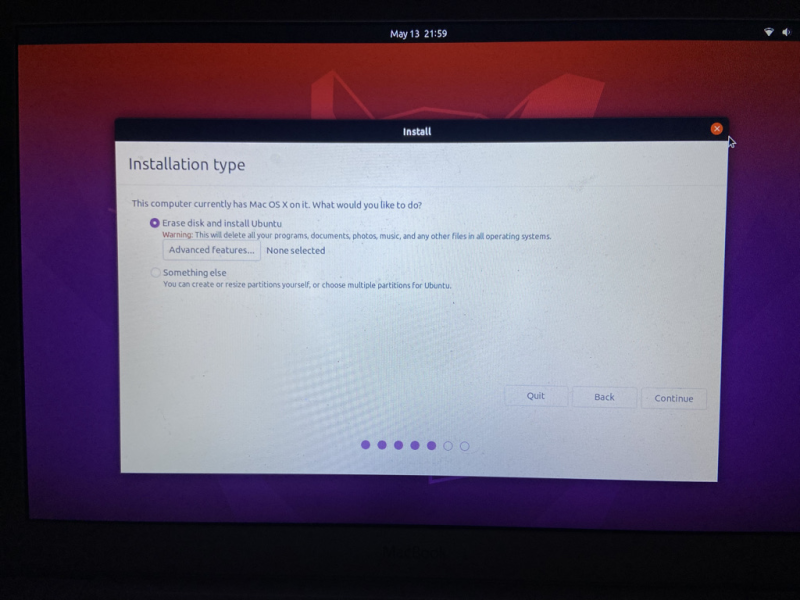
I want a normal installation, download updates during install, I also checked the install third-party software. Click continue:
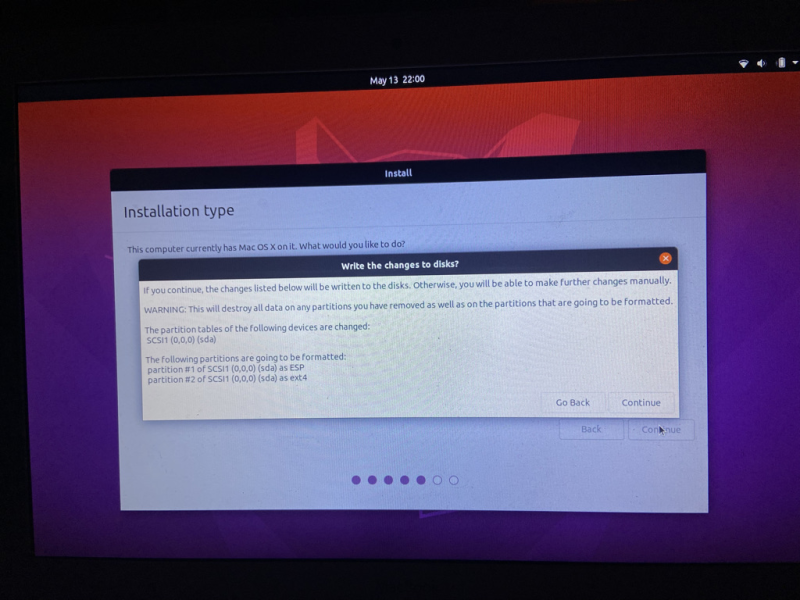
You may see something different, in this case I am going to erase the disk and instal Ubuntu, click continue, you will get a prompt:
Click continue. Select where you want the timezone, for me, I’ll stick that as Melbourne Australia.
Click on continue once done.
Nearly done, enter your name, what you want to call the machine, your username and password, continue. Ubuntu will install.
When the install is complete, you will be asked to restart your machine:
Click restart now. The machine will spin down and you will be asked to remove the install media.
So now is the moment of truth, remove the media and hit enter.
When booting, I got the error:
After digging around online, I read that this is a common issue when installing Linux on older machines. But the good news, there is a work around.
Stick the install media back into your machine and repeat the process to get into the install screen:
This time select “Try Ubuntu”.
Open the documents file structure and navigate to “Your_Hard_Drive/boot/efi
As you can see, nothing is there. We need get a shim64.efi file in it.
Navigate to /boot/grub/x86_64-efi, find the grub.efi
What we need to do is move this as root, right click in this directory and open it in terminal. Run the command:
sudo cp grub.efi ../../efi/shim64.efi
What we need to do is move this as root, right click in this directory and open it in terminal.
Run the command:
sudo cp grub.efi ../../efi/shim64.efi
Job done. Now reboot the machine. I got the same error when rebooting, but after a few seconds, maybe 10 seconds or so and it will start to boot up.
Good luck!


